


The Castle for Poser & Vue
 (No Ratings Yet)
Take a look at this awesome castle; The Castle by deadhead. I bought this castle a few days ago. It was a gamble as I am not that good with material settings and I wanted the rustic look of this castle. I finally did manage it, but with some trial and error.
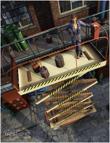
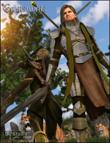
This castle is huge. So big, in fact, that I had to scale TerraDome to 500% percent in order to get a descent size TerraDome setting to render it in. To give you an idea as to how big this castle is, I added a Victoria V4 figure to the scene and placed her at the top of the entrance stairway to the castle.
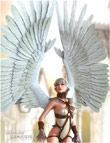
I used the Darcie for V4/G4 morphs and dressed her with Spartana for V4; a Spartan hoplite outfit.
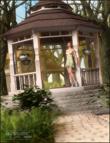
The Castle has three domed towers. A large balcony on the highest domed tower. A bridge that spans two of the domed towers. Two main gates that can be raised and lowered, and two doors that can, also, be opened and closed. You also get a Vue version, as well.
This is the castle you should get for your fantasy and, even, your real castle renders as the domed towers are reminiscent of the Byzantine empire.
There are some weak points; but this depends on your use of the castle. If you use it for outdoor renders only you shouldn't have much to gripe about. If you are also looking to render some indoor scenes in the castle, then you will have to deal with camera positioning. This is because the castle is one full object and there is no way to hide roofs or walls to help you with that. Some indoor rooms are big enough so that you don't have much problem, but, others are small and will present some camera and figure positioning issues.
The trick to getting that rustic look in the promos is to go into the Material room in Poser and select NG_Castle as the Object and change the texture strength for the materials from 1.0 to 1.2 (I tried 1.5 initially and it was way too much). For this render I changed the texture strength of the following mats: Grey_stone, bigbottom, brick, red, roof, w1, w2, and w3.
I used the following Manual Settings to render these scenes: Cast Shadows and Raytracing checked, Gamma correction unchecked, and Min shading rate set to 0.00.